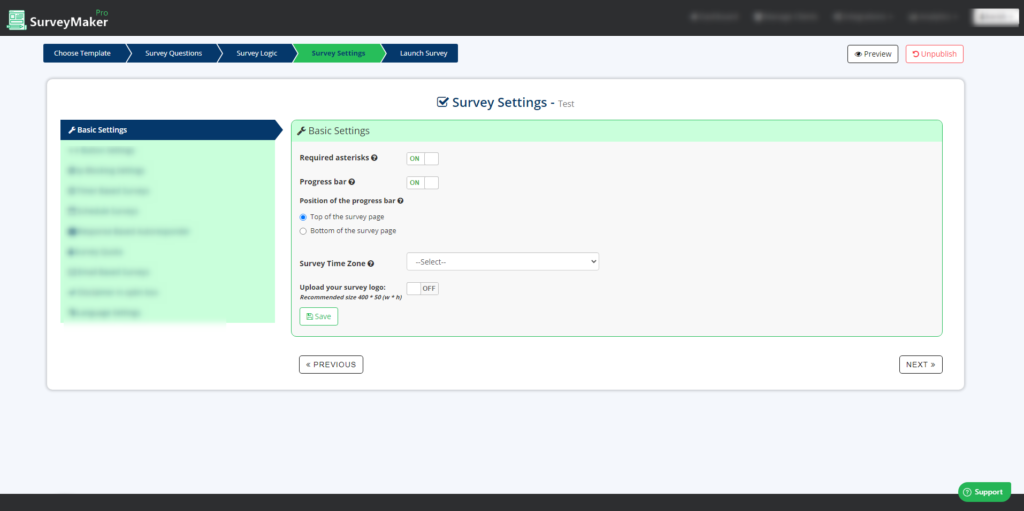
Basic setting allows you to do some basic tweaks with the survey that has been created. Setting your Survey Time Zone, Asterisks for required answers and a few other basic functionalities can be changed here.
We can find the survey setting when creating or editing our Surveys next to the Survey logic.
Required Asterisks is an option to enable (*) to the questions that are mandated to be answered. You can click on the toggle button to turn the feature on and off .
The Progress bar shows the current progress of that survey, it will be handy to know how far someone has progressed when answering the survey. You can also change the position of the bar to top or bottom.
You can choose your desired survey time zone by clicking the drop-down box and you can also add a logo to your survey by uploading it.
Please click the Save button to save all the changes that were made.
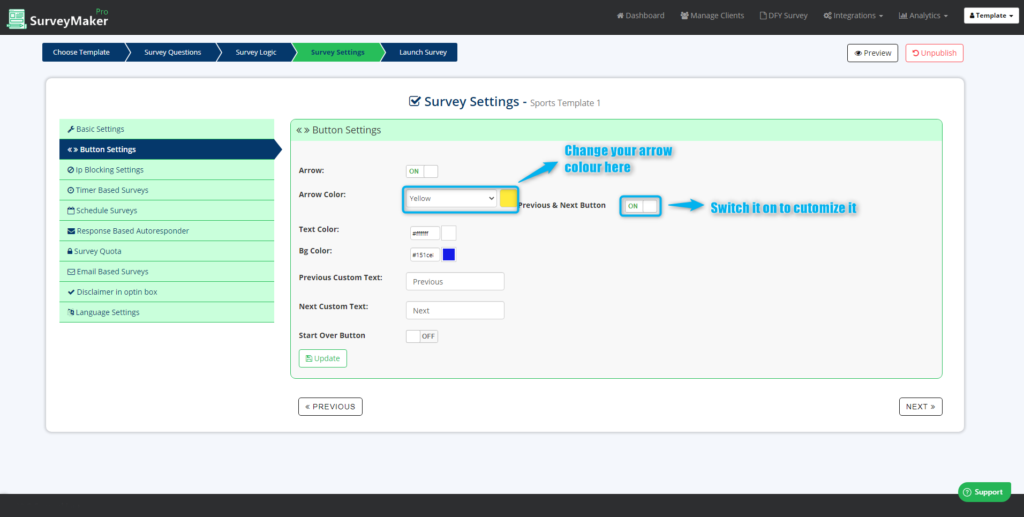
Button Settings
The button setting allows you to customize the button on the survey page. You can change the colors and text of the buttons in this setting.
Changing the arrow color will reflect on the survey page here.
You can also change the colors and text of the next and previous buttons used on your survey page.
Click save to save all the changes made.
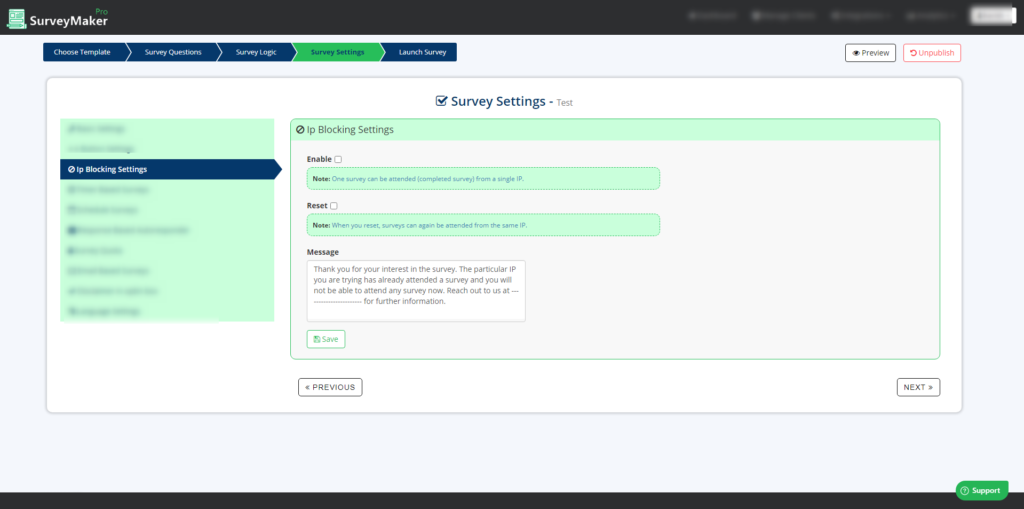
Ip Blocking Settings
Ip Blocking is a special feature used to stop multiple answering of the same survey from a single IP.
This is used to stop data inaccuracy and duplication of data.
Switching this on will improve the survey data accuracy and interpretation.
Clicking the ‘Enable Option’ will enable this feature where a person can answer a survey only once from an IP. Once they complete a survey from a specific IP, they won’t be able to re-answer the survey. It will display a specific message when he tries to re-answer the survey.
The Reset option will remove this feature.
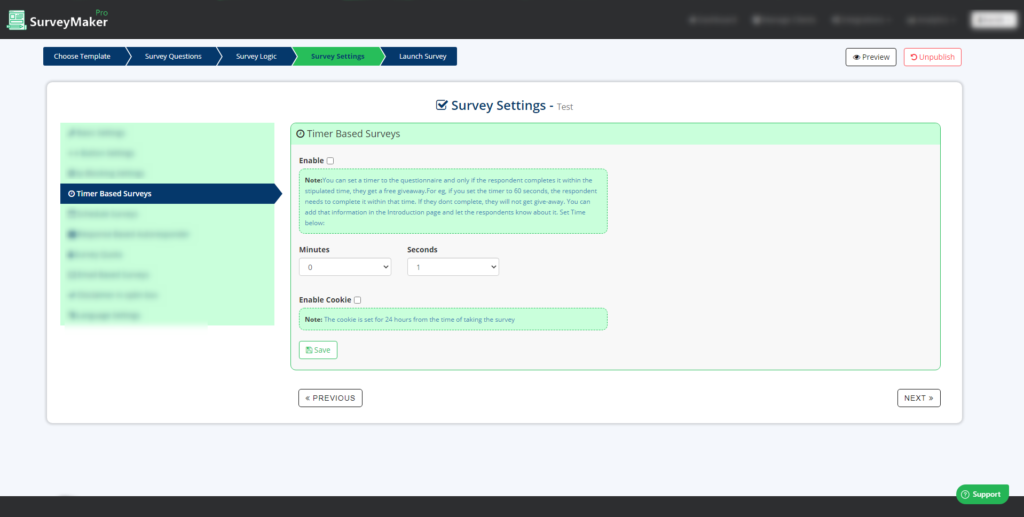
Timer Based Surveys (Pro)
You can set a specific time within which the survey has to be completed by the respondent.
This feature works well with give-aways, where the respondent has to complete the survey before the stipulated time to get the reward.
Enabling cookie will not allow the respondent to re-take the survey for 24 hours.
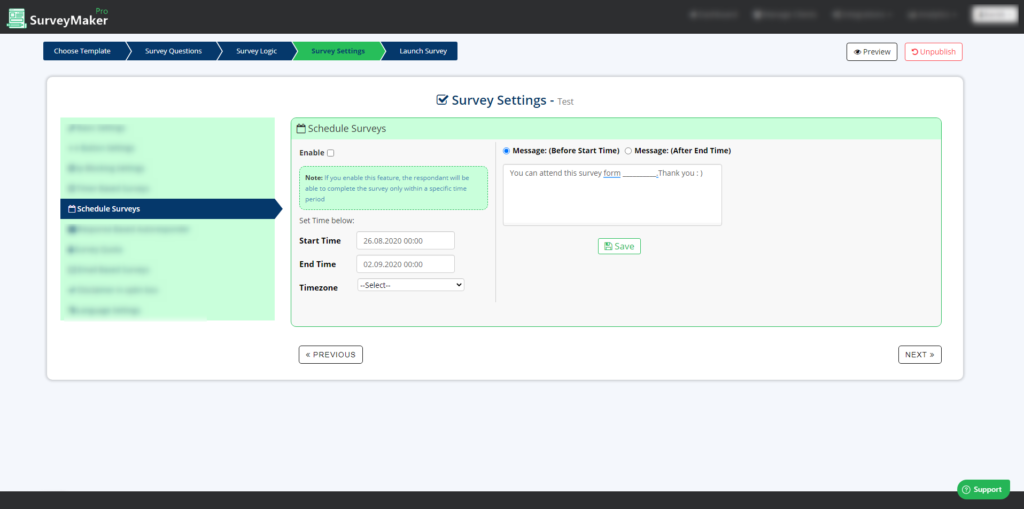
Schedule Surveys
Schedule Survey allows you to feature the survey for a specific period.
You can set it according to your desired time zone.
Respondents will receive a specific message when they visit the survey before and after the time period.
The Enable option will switch the scheduling on so that the survey will be open for that specific period. You can select your desired time zone from the drop-down box. Edit the message that should be shown to the respondents who visit before or after the scheduled period.
Click save to reflect all the changes made.
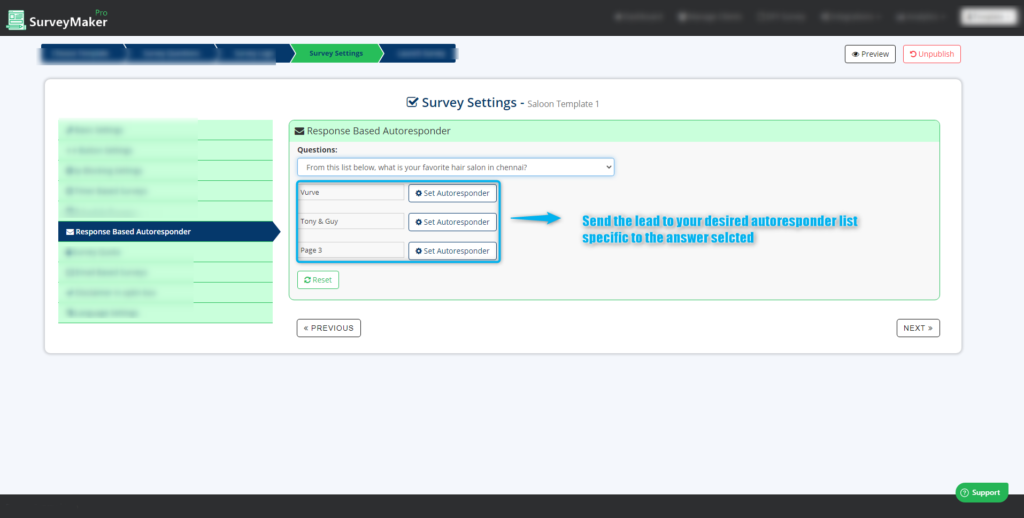
Response Based Autoresponder (Pro)
Response based Autoresponder allows you to send leads to a specific list according to the answers they choose. You can use this to transfer leads according to a specific list holding a similar target audience.
Click the drop -down box and choose the question you want to set for the Response based autoresponder feature. This feature only works for questions with choices.
Once you have selected the question, choose the answers and a specific auto-responder to transfer those leads there.
Now the leads who select that answer will be directed to that autoresponder list.
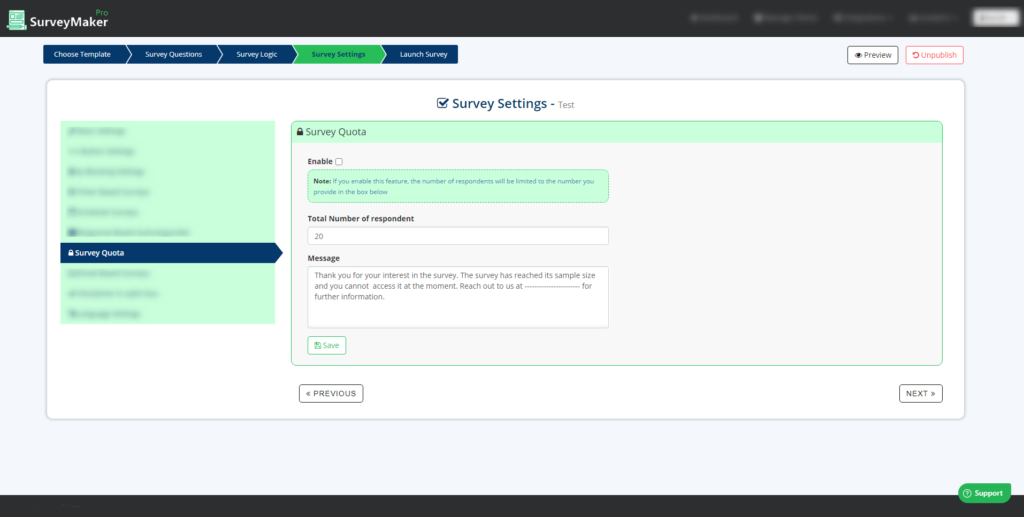
Survey Quota (Pro)
Survey Quota will restrict the total number of respondents that can answer the question. Use this feature if you have a specific sample size you want to work with.
It will display a message in the test box to all those who visit the survey page after the quota has been reached.
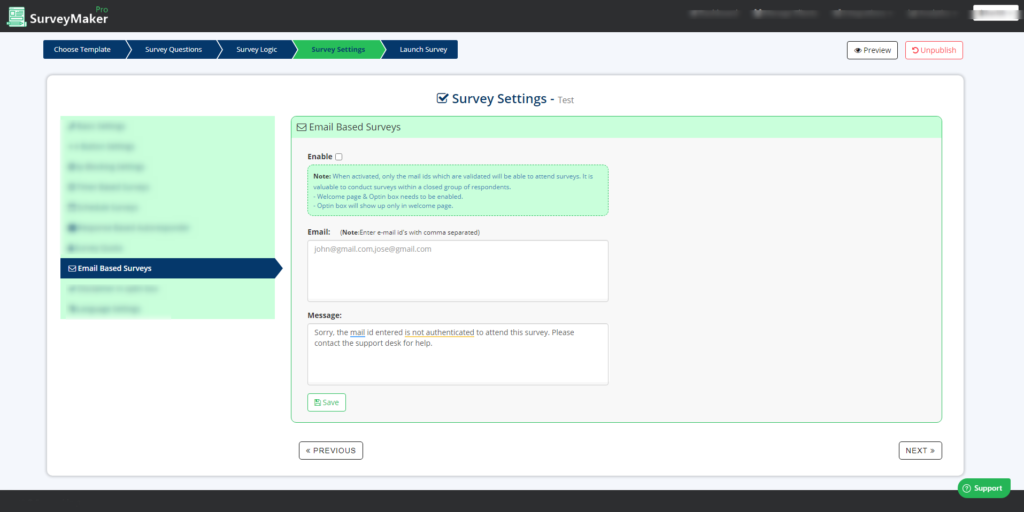
Email Based Surveys (Pro)
An Email based survey is a handy feature when it is used with a closed group. This feature will only allow the people who have been granted access to take the survey.
Enter the email Id’s for the people you want to give access to the survey. The survey will ask the respondents for their email and cross check with your list. It will leave out the message input in the text box for the ones who don’t have access to it.
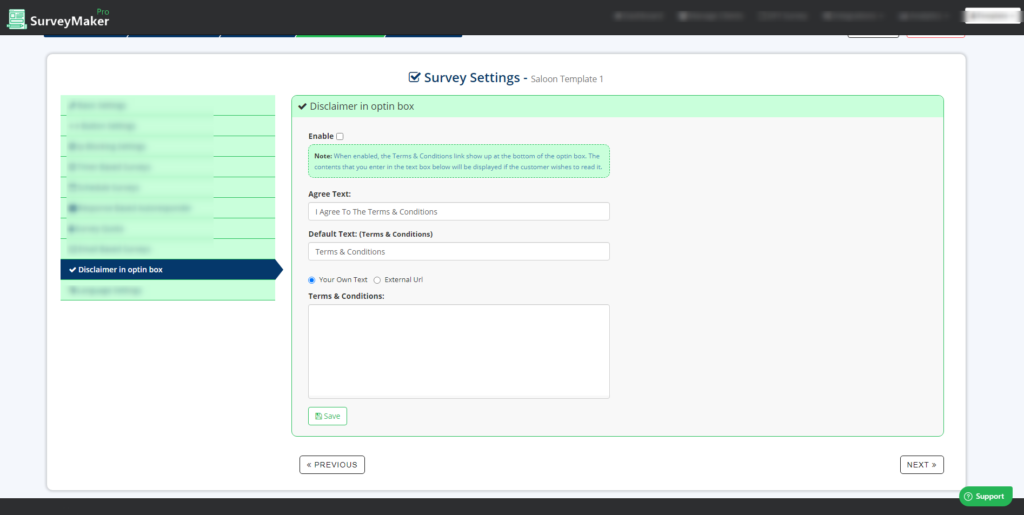
Disclaimer In Opt-in Box
The Disclaimer Opt-in box enables a Terms & Conditions link to show up at the bottom of the optin box. The contents you enter on the text box below will be displayed if the customer wishes to read it.
Agree text is the message that the customer will check while progressing to other content. You can either add your Terms and conditions here by editing the text box or redirect them to a link which has the Terms and conditions posted.
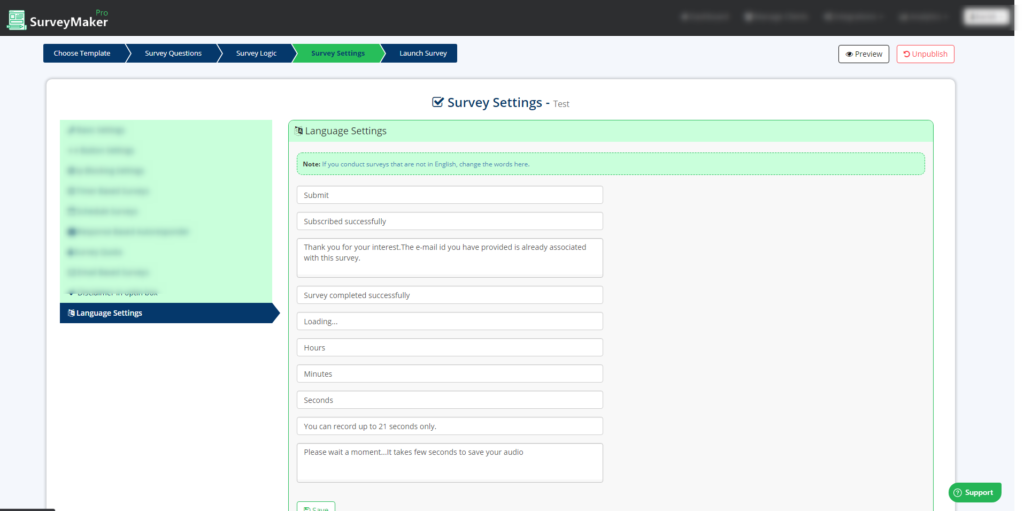
Language Settings
Language settings allow you to change the system generated words to your language. This will change the pre-defined function or feature words to your language.
Replace the word that means the same to the specific text box to change it to your language.