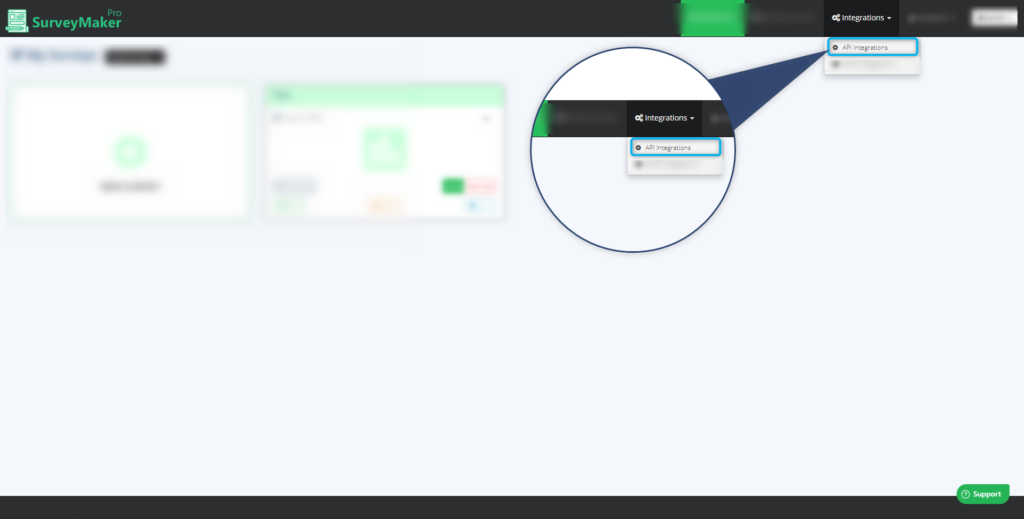
Click on Autoresponder and then SendReach from the list,
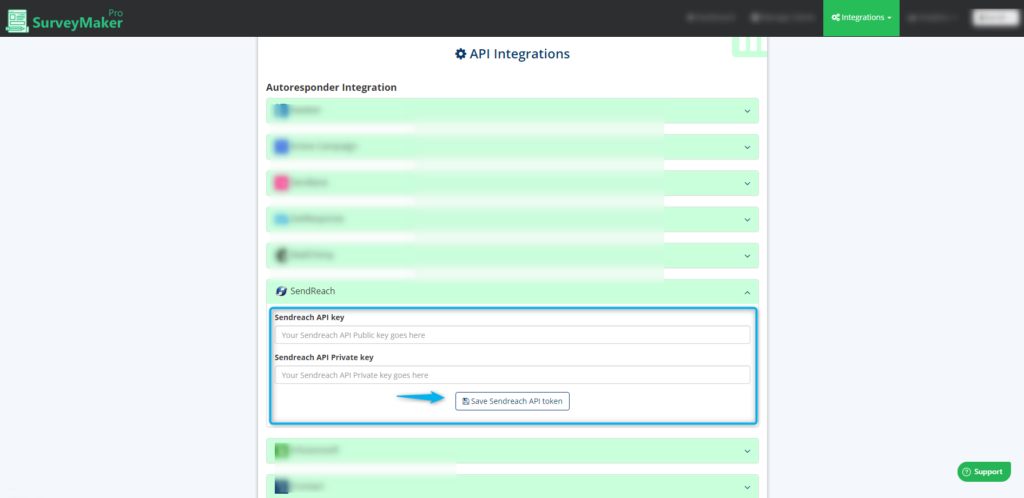
Step 2
Add your API details.
A.Enter your SendReach API public key
B. Enter your SendReach API private key
C. Click on the “Save SendReach API keys,” icon.
Once SendReach is integrated, a tick mark will appear
Step 3
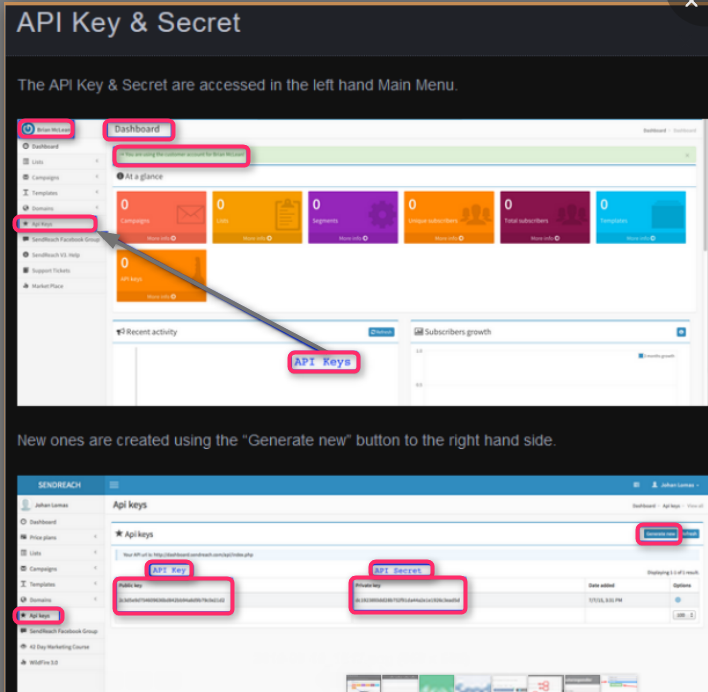
Follow the steps to get the API details from the SendReach.
Copy the API keys from the API keys sections and paste it in the Survey Maker Pro.
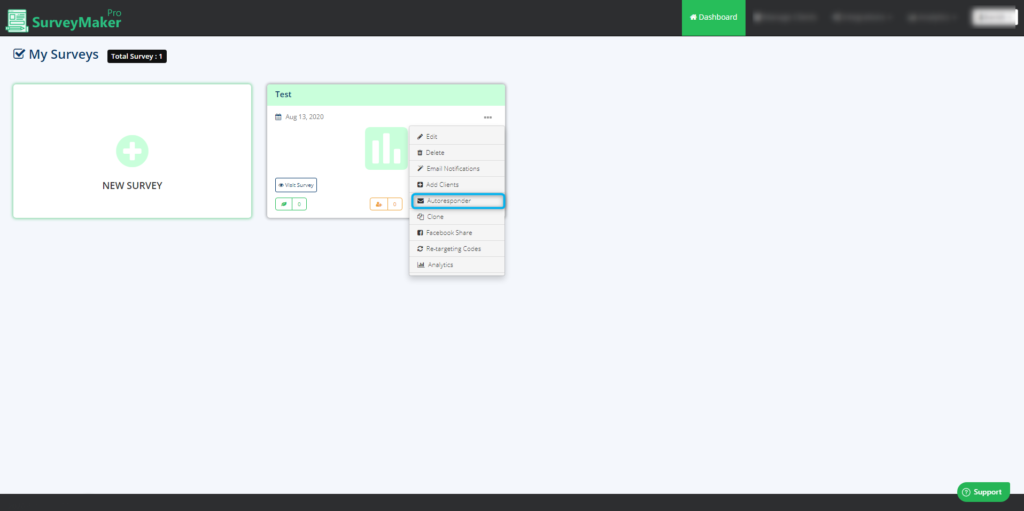
Step 4
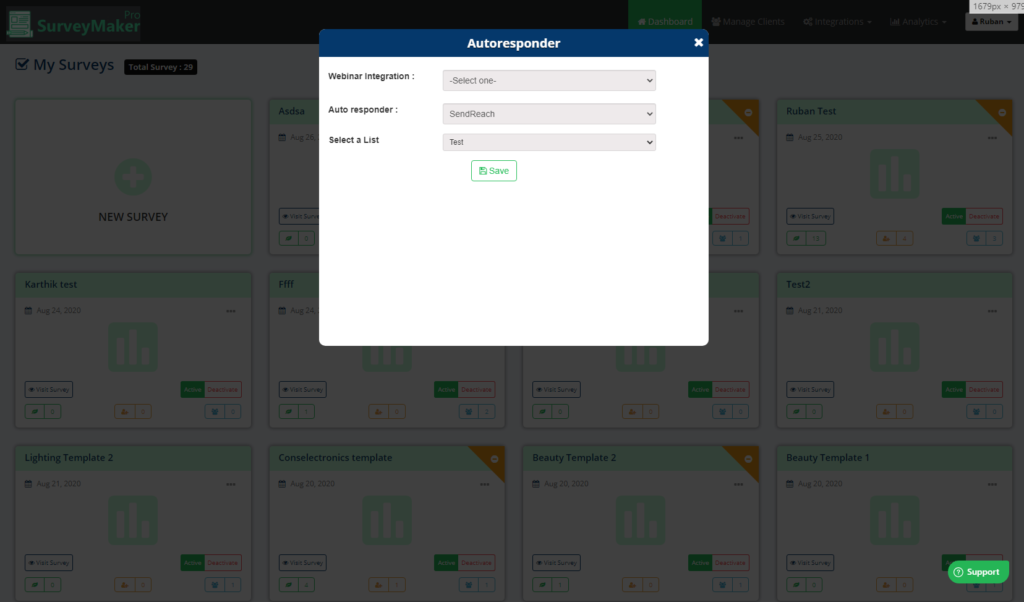
Now, go to your Dashboard and click on the survey you want to integrate, then choose the edit option on the right top corner. Click on the Autoresponder icon.
Step 5
Choose SendReach Autoresponder from the list and select the preferred list to where you need to send your subscriber’s email id. And then click on the save settings button.
And now, Email ids of your entire subscribers who signed up will be added to your preferred list in SendReach account.