Knowledge Base
Edit Templates
Template Edit Mode
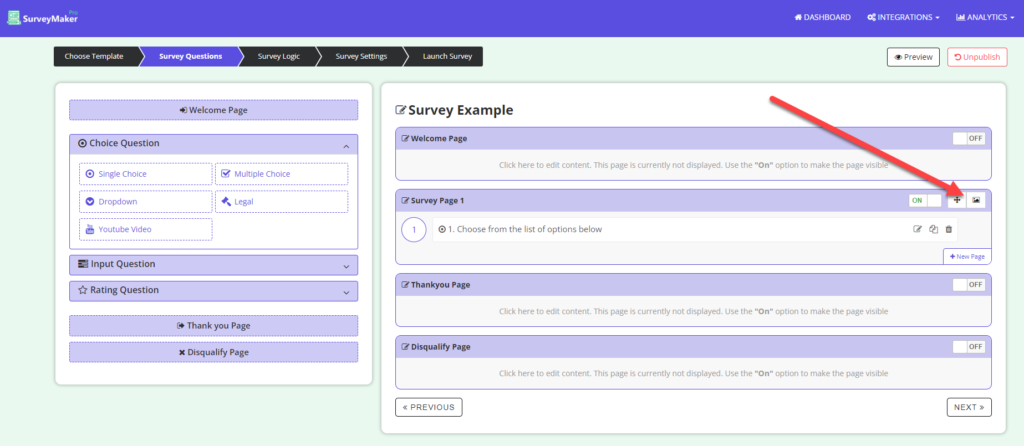
From the “Survey Questions” tab:
Click on the Image icon on the right hand side of your first survey page as in the image below. This will open the template editor.
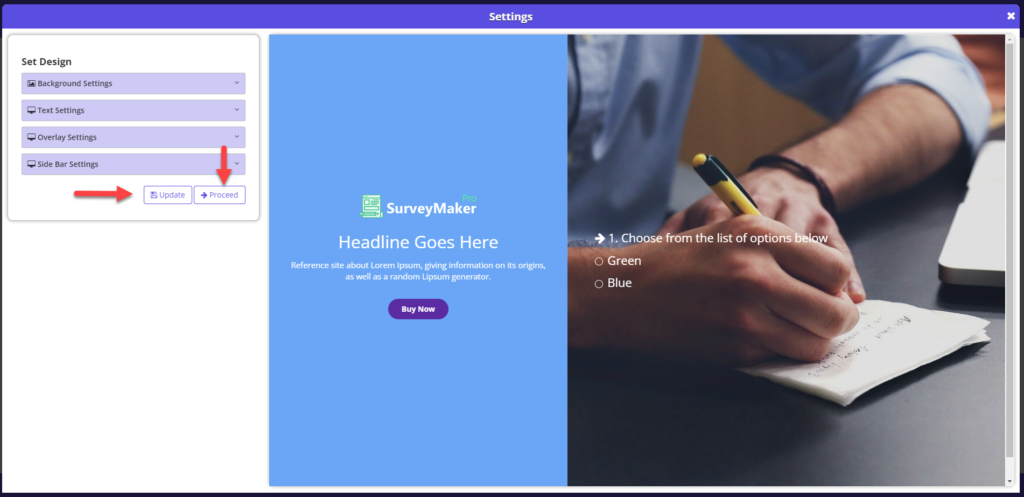
Set Design
The left hand column of the editor displays three options:
- Background Settings
- Text Settings
- Side Bar Settings
The right side displays the current template settings and will change as you modify the setting in these three ares.
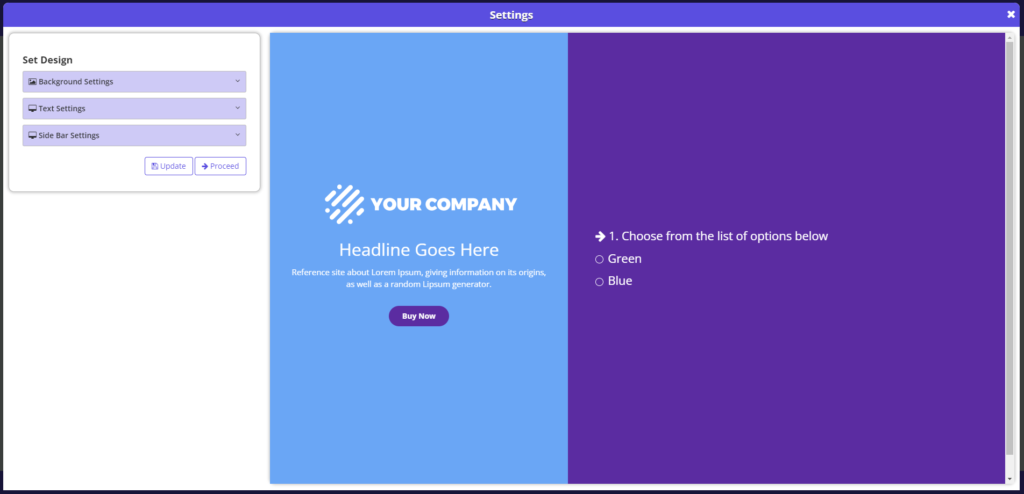
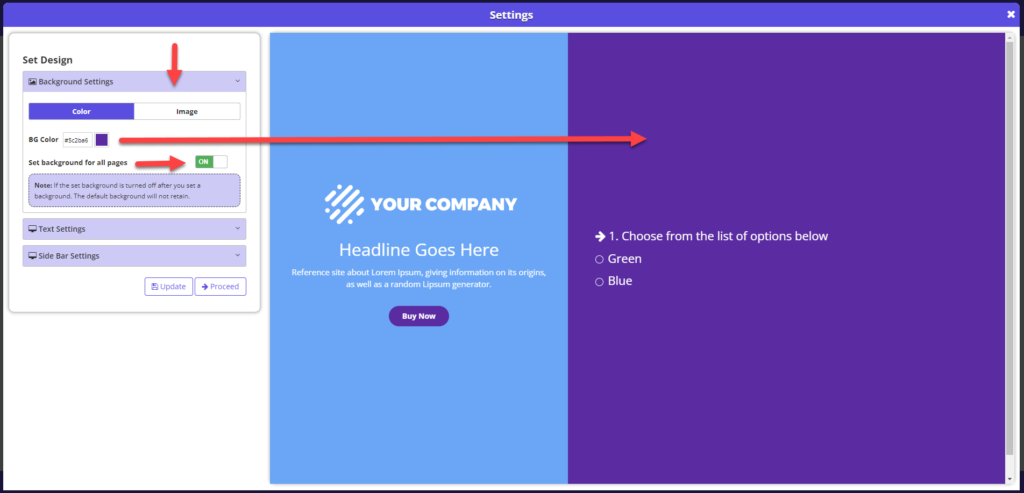
Let’s start by modifying the background color of the template section that will be displaying our survey questions.
Click on the Background Settings tab to open up the editor for this section.
You will see the BG Color selector where you can insert any hex color of your choosing. In our example, we’ve chosen #5c2ba6, to give us a purple background color.
We’ve set the “Set background for all pages” to “On” so that the color will be displayed on all pages. (Note: If this selector is in the “Off” position, it’s possible to have a different background color for each page in your survey. You would just need to manually set the color you want for each individual page.)
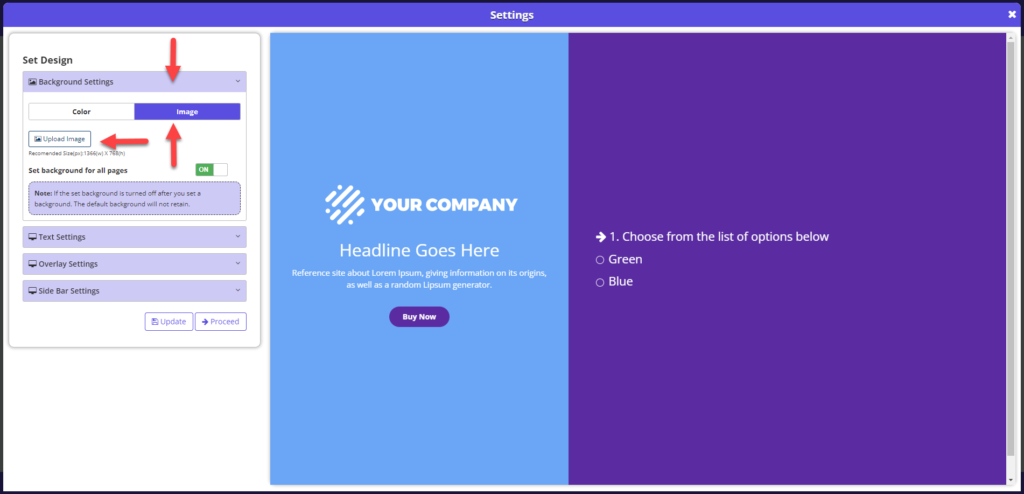
Optional Image
If you like, you can display a background image behind the survey questions.
Select the “Image” tab.
Then click on “Upload Image”
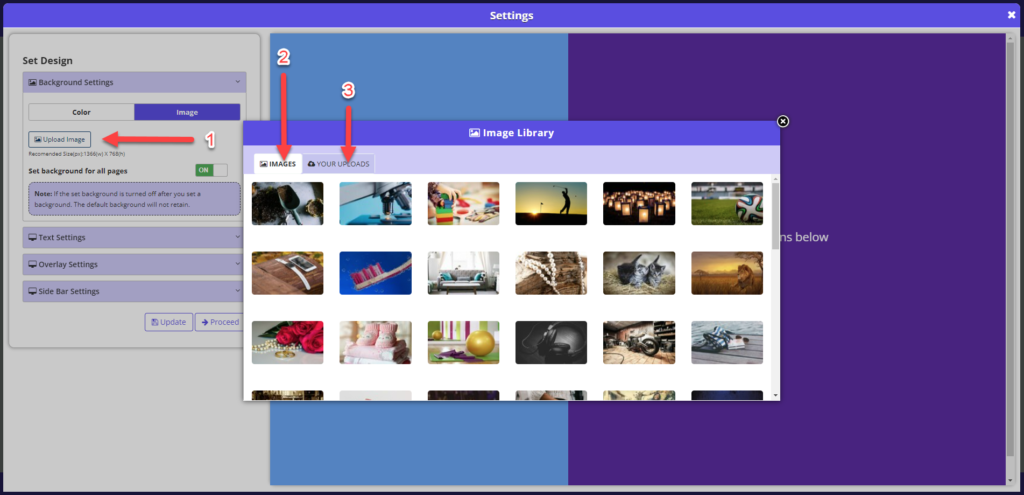
Select a Background Image
The “Image Library” pop-up will appear. You can select from a choice of preloaded stock images, or upload one of your own.
Stock images: We have many stock images you can choose from. If you’d like to choose an existing image, hover over it and click on “Insert”.
If you click on the “Your Uploads” tab, you can upload an image from your files. (Note: All uploaded images will remain in your library for use in future surveys, if you wish.)
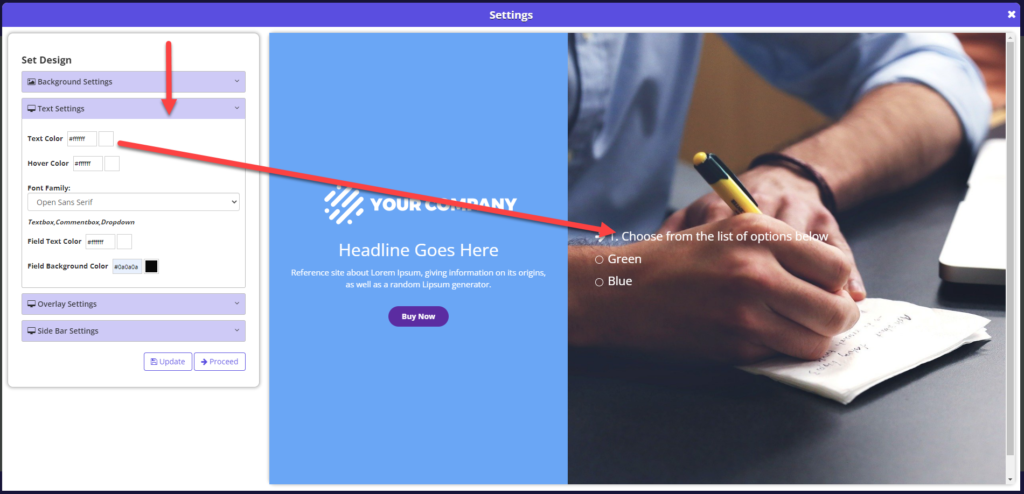
Background Images (Continued)
Here you’ll see a background image which we’ve selected from our stock images.
At the moment, the image is a bit too bright. We’ll darken it a little in a moment to provide a better contrast for the white text we’re using for our survey questions.

Text Settings
Let’s work on the text settings for our template. These settings apply to the survey questions on the right hand side of our template.
Click on the Text Settings tab to open up the editor for this section.
You’ll notice we have our Text Color set to #ffffff (white). You can insert any hex color you wish.
For our example, we’re leaving the Hover Color the same, so the text color will not change upon a cursor hovering over the question. If you’d like the color of the text to change when the cursor hovers over the survey question, you can change the hex color here.
Additional options:
You can also use this section to:
- Change the Font Family
- Change the Field Text Color
- Change the Field Background Color
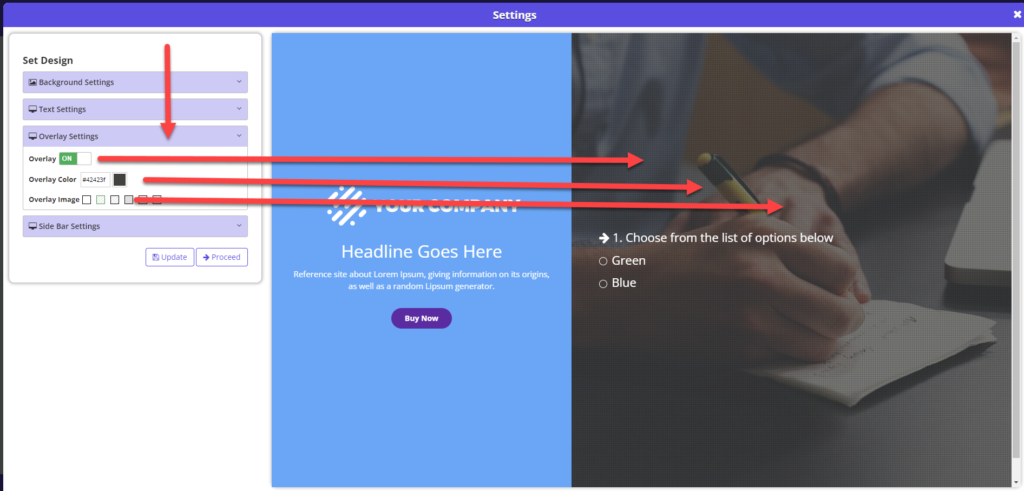
Overlay Settings
The “Overlay Settings” options give us greater control of the appearance of the survey section of our template.
Click on the “Overlay Settings” tab to open up the editor for this section.
In our example, we’ve switched the “Overlay” selector to the “On” position.
Using the “Overlay Color” option, we’ve selected the hex color #42423f to provide a darker overlay to our image so that our white text will stand out in better contrast.
We’ve also applied a fine grid as well from the “Overlay Image” selector. There are five built-in options you can choose from. (Note: If you select the first item in this section, no grid will be applied.) Again, experiment to get the desired result for your design.
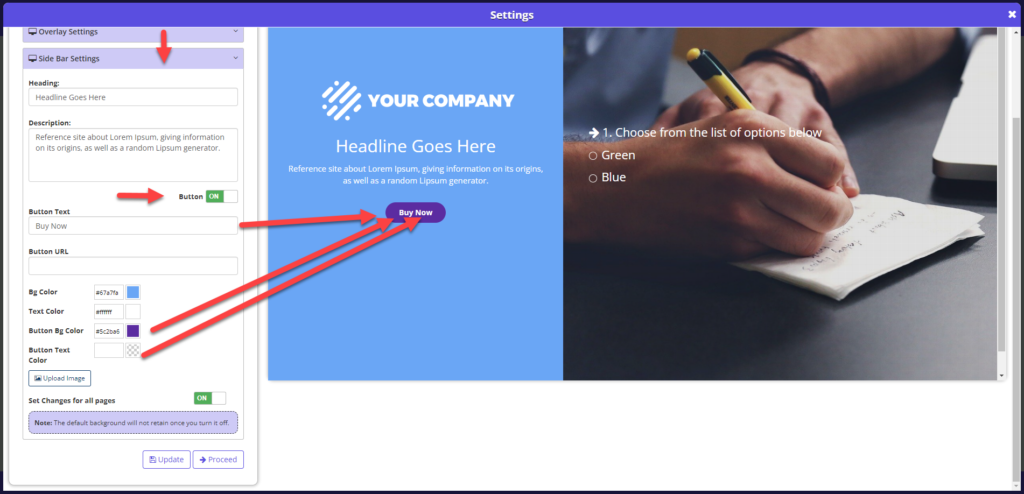
Side Bar Settings - Text and Background Color
The “Side Bar Settings” options apply to the left hand section of our template.
Click on the “Side Bar Settings” tab to open up the editor for this section.
The first section, “Heading:” can be used for the title of your survey or for any other purpose you desire. If you leave this section blank, no title will be displayed. Same goes for the “Description:” section. If you leave this blank, nothing will be displayed.
The “BG Color” option controls the background color of the left side of the template. In our example, we’ve selected the hex color #67a7fa to provide a blue background. Any hex color you choose can be inserted here for your desired results.
The “Text Color” section controls the text color on the left side of our template, in this case we’ve chosen #ffffff (white).

Side Bar Settings - Button
The “Button” options apply to the left hand section of our template.
If you move the “Button” selector to the “On” position, a button will be displayed. No button will be displayed if the selector is in the “Off” position.
The “Button Text:” section is used to place text on the button. In our example we’ve used “Buy Now” as our text.
The “Button URL” section is used to input the destination of where you want the individual to be redirected upon the “click” of the button.
The “Button Bg Color” section controls the color of the button.
The “Button Text” section controls the color of the text on the button, in this case it’s set to #ffffff (white).
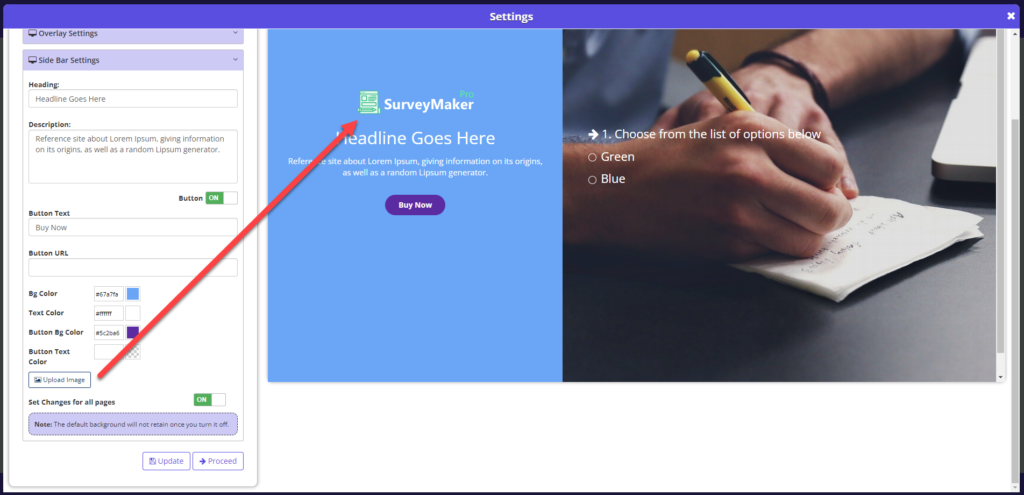
Side Bar Settings - Upload Image
The “Upload Image” option is most often used to apply a company logo to the left side of the template, but actually any image can be inserted here. In our example, we’ve uploaded and inserted the Survey Maker Pro logo.
Side Bar Settings - Update and Proceed
Once you are satisfied with all of the design elements for your template, it’s time to save your work. (You can save your work periodically as well.) Click on “Update” to save the template design, then click “Proceed” To move on to the next section “Survey Logic”.