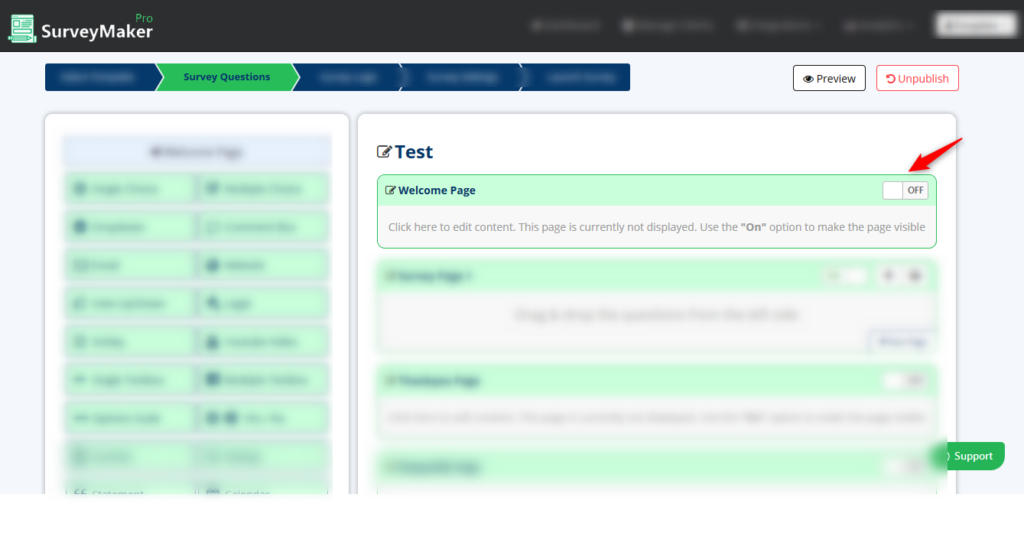
Welcome page is the first page that your target audience are going to land at before starting the survey.
You can add something interesting here to make your audience get involved and start the survey.
Step 1 : Click on Survey Question
Step 2 : Switch the Welcome Page Toggle On/Off depending on your need
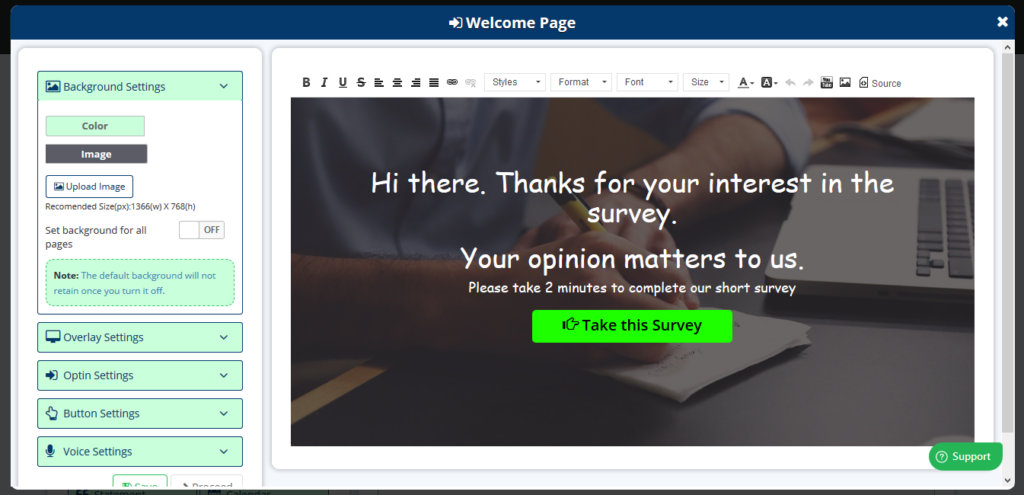
We have a variety of options to help you personalize you welcome page.
Background settings – You can choose your own color, Upload you own image or choose from pre loaded images given by us. You also have the option to set the same image as the background for all the pages throughout the survey.
Overlay Settings – Set a overlay tint so that your images, font styles and colors mix and match well.
Opt-in Settings – This helps you get you target audience choose weather to provide details like Name, E-Mail ID, Phone Number and more.
Button Settings – Change the text, color and font styles inside the buttons which are clickable in the pages.
Voice Settings – Turn On/off the Text to Speech option available for the people taking the survey.
Click Welcome Page and change settings for the welcome page.
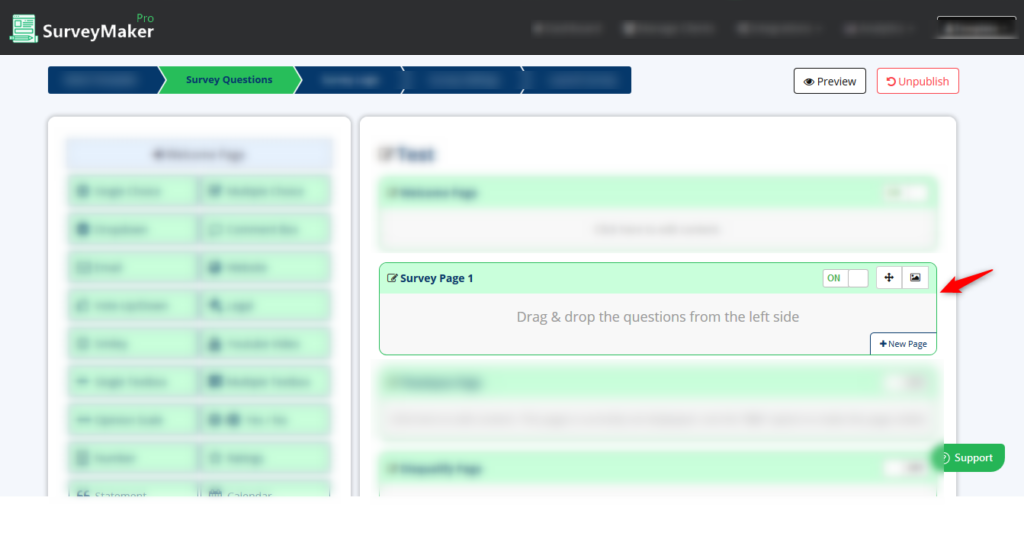
Survey Questions
These are all the different kind questions which are available for you to choose to build your Survey.
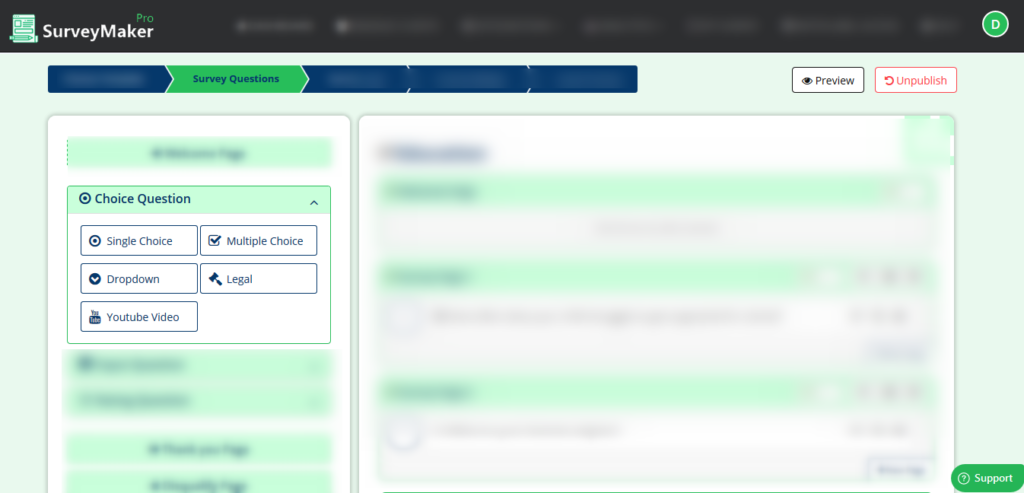
Choice Questions :
Single choice
Multiple Choice
Dropdown
Yes/No (PRO)
Legal
Youtube
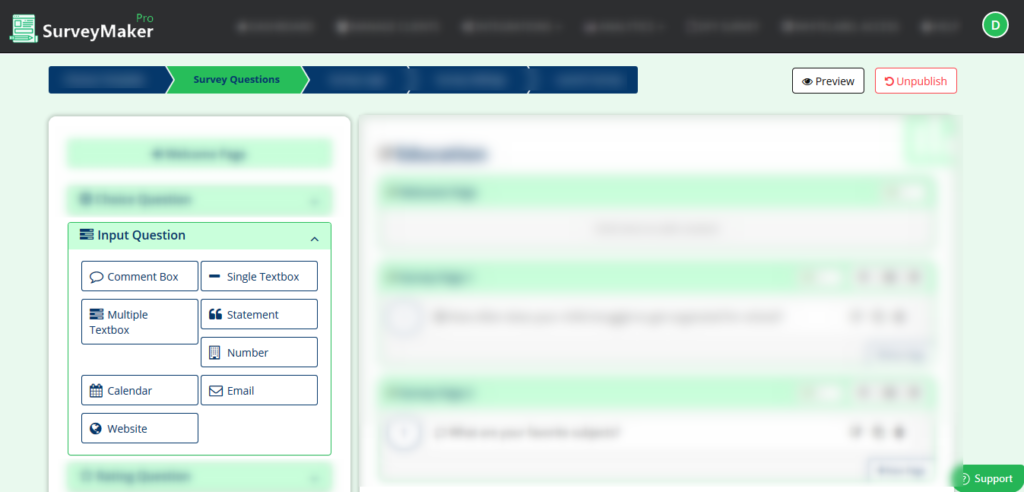
Input Questions :
Comment Box
Single Textbox (PRO)
Multiple Textbox (PRO)
Email
Website
Statement (PRO)
Number (PRO)
Calendar (PRO)
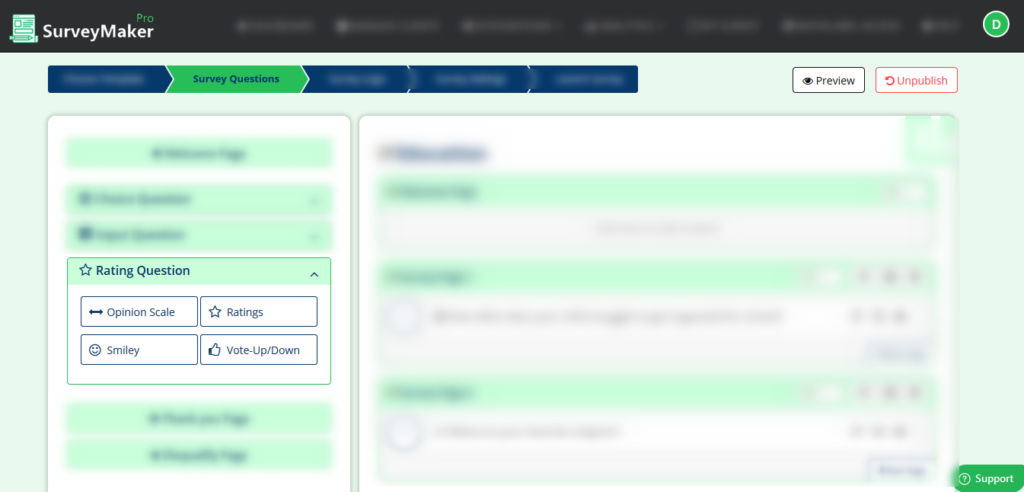
Rating Question :
Opinion Scale (PRO)
Ratings (PRO)
Smiley
Vote Up/Down
Survey page
This is the space where your questions will appear after creating questions from the available options.
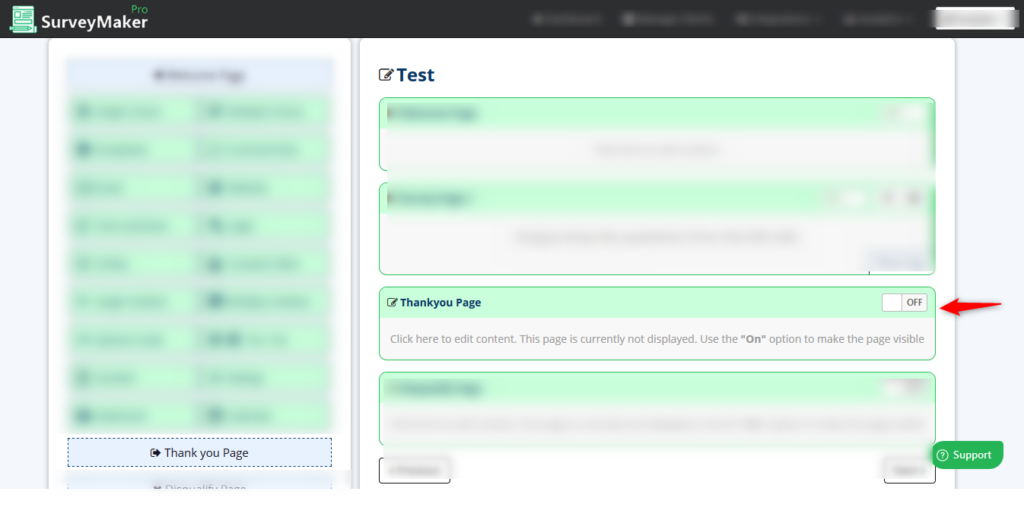
Thank You page
The Thank You page is the page that your target audience is going to land on after completing the survey.
You can add something interesting here to make your audience get involved and finish the survey.
Step 1 : Click on Survey Question
Step 2 : Switch the Thank you Page Toggle On/Off depending on your needs
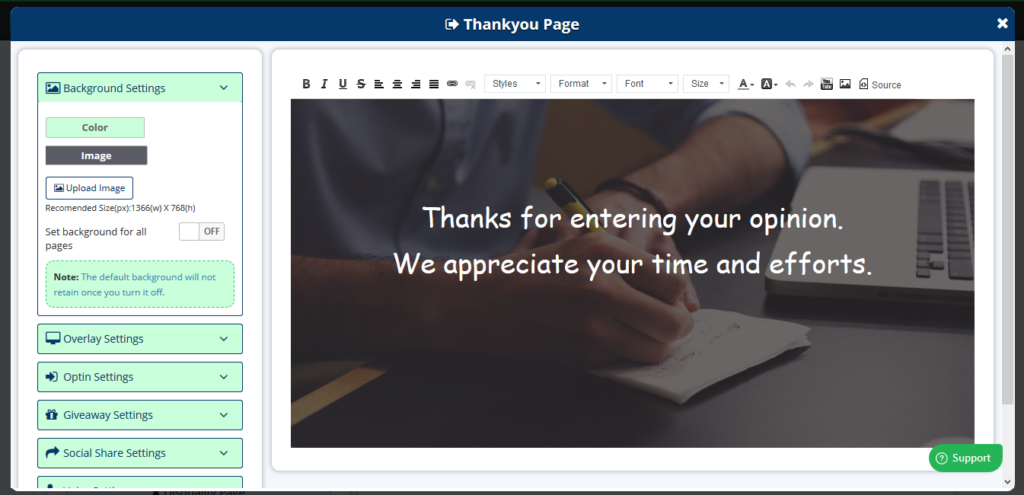
Background settings – You chan choose your own color, Upload you own image or choose from pre loaded images given by us. You also have the option to set the same image as the background for all the pages throughout the survey.
Overlay Settings – Set a overlay tint so that your images, font styles and colors mix and match well.
Optin Settings – This helps you get you target audience choose weather to provide details like Name, E-Mail ID, Phone Number and more.
Giveaway Settings – Turn On/off this option if you want to add a giveaway for the people who have taken the survey
Button Settings – Change the text, color and font styles inside the buttons which are clickable in the pages.
Social Share settings – Enable this option to share the survey in facebook and twitter
Voice Settings – Turn On/Off the Text to Speach option available for the people taking the survey.
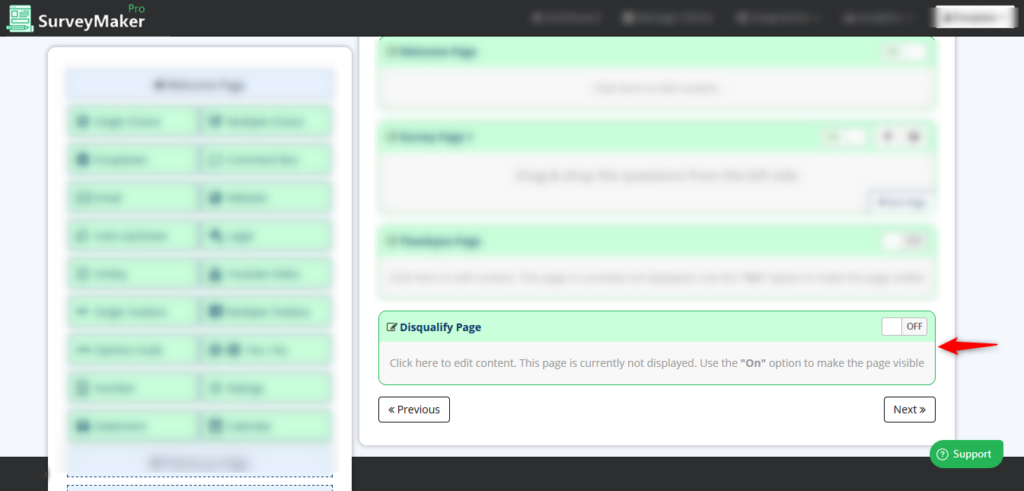
Disqualify page
The Disqualify Page is the page that your target audience is going to land on after completing the survey.
You can add something interesting here to let your audience know the end result after finishing the survey.
The only way you can direct them to the disqualify page is by setting a Logic.
Step 1: Click on Survey Question
Step 2: Switch the Disqualify Page Toggle On/Off depending on your needs
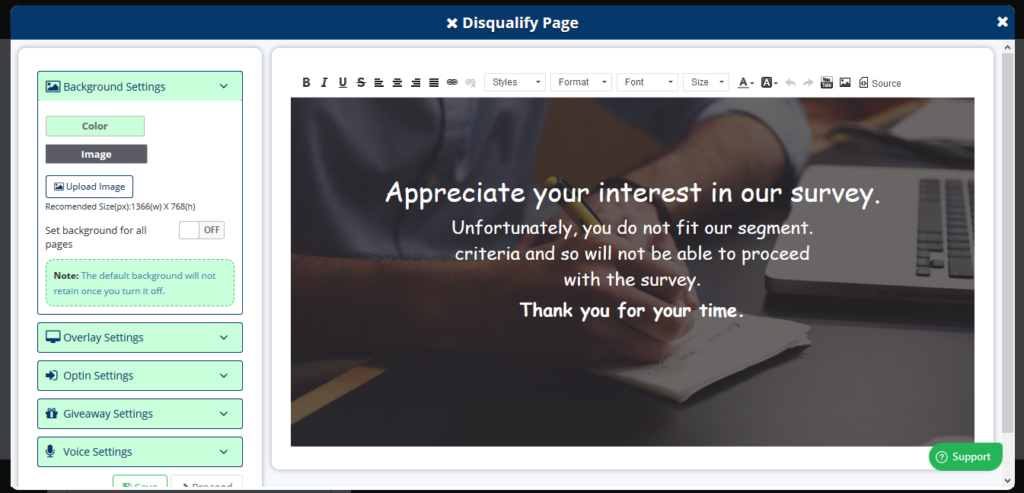
We have a variety of options to help you personalize your Disqualify Page.
Background settings – You can choose your own color, Upload you own image or choose from pre loaded images given by us. You also have the option to set the same image as the background for all the pages throughout the survey.
Overlay Settings – Set an overlay tint so that your images, font styles and colors mix and match well.
Opt-in Settings – This helps you get you target audience choose weather to provide details like Name, E-Mail ID, Phone Number and more.
Button Settings – Change the text, color and font styles inside the buttons which are clickable in the pages.
Voice Settings – Turn On/off the Text to Speech option available for the people taking the survey.
Click Disqualify Page and Change settings for the disqualify page.